Constructing the Pyramid Bridge
While I wait a few weeks for the lacquer to dry I can build the bridge for the guitar. Keeping true to another original design element, this guitar will have a “pyramid bridge.” The pyramid bridge design was more common in the early 20th century, though there are certainly guitars being made today with them, including many of my own. The strings on this guitar will be anchored to a metal tailpiece, so there will be no need for bridge pin holes in this bridge.
I start with a piece of Brazilian Rosewood that is approximately 7″ X 1″ X 3/8″. The final thickness is determined by the angle between the neck and the body of the gutar. Generally guitar bridges are about 6″ long, but Stellas were almost 7 inches. I think this is a good thing on a 12 string guitar because the longer bridge disperses the pressure of all of those strings over a larger part of the soundboard, putting a little less strain right in the center. The first operation is to rout the channel where the bone saddle will sit. As with virtually all steel string guitar bridges, the saddle slopes backward about 1/8″ from the treble side to the bass side to allow for extra string length compensation on the thicker bass strings. This keeps the guitar in tune as the player moves up and down the neck. Here is a photo of the routing set up. The rosewood is held against a tapered piece of wood with double sided tape. The taper creates the 1/8″ slope toward the bass side.
The saddle slot is cut at least half of the depth of the bridge. This ensures that there will be plenty of saddle material in the slot and there won’t be any concern about the saddle leaning forward or breaking.
After the slot is finished, I cut out the valleys between the central area of the bridge and the pyramids. Here the valleys have been rough cut on the table saw. They will be smoothed later.
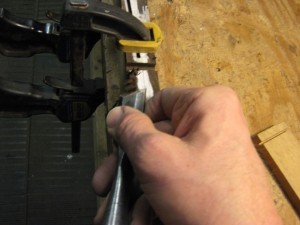
Now I use chisels and rasps to form the pyramid shape on each wing of the bridge.
Here is the roughed-out bridge.
I scrape and sand all of the details.
After sanding the entire bridge to 220 grit, it is given a coat of shellac to seal the wood. Here is the finished bridge:


