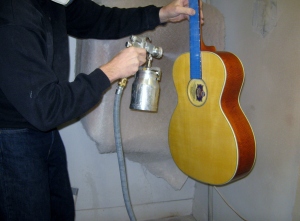
Applying the Lacquer finish
I use nitrocellulose lacquer as the finish for most of the instruments I build. Each of the many acceptable types of instrument finishes has its strengths and weaknesses. I have worked with lacquer for many years and have a pretty good understanding of it. I have developed an approach to working with it that gives me consistent results. It takes 4 to 6 weeks for me to get the finish on a guitar.
People often ask me how many coats of lacquer I apply and I am never really sure what they are hoping to hear in response. An easy answer to the question would be that there is only one coat, since subsequent layers melt into and fuse with previous layers when they are sprayed. I do have an approximate count of the number of times I point my spray gun at the guitar, so I could tell people that there are 15 to 20 coats of lacquer. However, there is no consistent definition of what a “coat” represents as far as a quantity of lacquer. Every person who sprays can apply a different amount. There are three ways to vary how much lacquer is applied with each pass of the gun: first, one can increase or decrease the volume of lacquer that comes out of the gun by adjusting a needle valve; second, by changing the speed at which the gun is passed across the surface, different amounts of finish material will be deposited on the surface; and third, by changing the thickness (viscosity) of the lacquer, more or less will remain on the surface after the volatile solvents evaporate. So my concern with telling people a specific number is that they might think it is either too many or too few coats, even though we aren’t necessarily thinking of the same amount of lacquer. I usually end up telling people that I don’t know how many coats are on the guitar and that I use just enough lacquer to seal all of the wood pores and to allow me to sand the finish perfectly flat and buff it to a high shine, which is true.
For the current guitar project my customer wanted the finish tinted a little bit on all of the surfaces of the guitar. I did this early in the spraying process so I could be free from worrying about sanding out the color when if comes time to level and buff the guitar. I didn’t remember to take any pictures at that stage, so all of the photos below were taken after the color was applied to each of the surfaces.
I first spray the body. This allows me to hold on to the neck and keep the guitar from swinging back and forth.
Next, I spray the front and back of the peghead.
Finally, the neck and heel are sprayed.
I will repeat this cycle 4 or 5 times in a day and then do it again in about a week. I will do this until I feel like there is enough lacquer on the guitar to allow me to sand it level. There really isn’t any need to sand between spray sessions because the solvents melt the new lacquer into what is already on the guitar.
After I have all of the lacquer on the guitar, I will let it cure for at least 3 weeks before I start sanding it. This allows time for most of the solvents to evaporate. If I try sanding and buffing the lacquer too soon, it won’t buff to a high shine and fine scratches will remain visible. Also, the lacquer will continue to cure and shrink for a while, so the sooner the buffing happens, the more settling you will see in the future. My experience is that after waiting 3 weeks, settling does not appear to be much of a concern.


