Neck (Pt. 2)
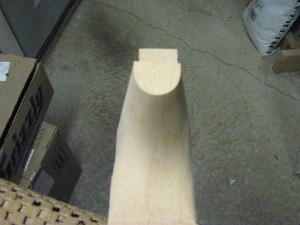
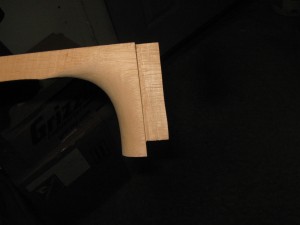
After the mortise and tennon joint is complete it is time to shape the heel of the neck (that’s the part of the neck that transitions to the body of the instrument). With a lot of my guitars I keep the heel a uniform width from the fretboard down to the back of the guitar, but this heel is going to be tapered like it is on Stellas. The initial shaping of the heel is done using chisels and rasps. I generally mark one or two reference lines before getting started, but after that, I just rely on my eyes and experience with shaping almost 300 heels to tell me what to carve away.
After a while, the heel is roughly the shape I want it to be, so I will turn my attention to the peghead. I will do the final clean up of the heel right before I glue the neck to the body.
The primary function of the peghead on a guitar is to hold the tuning machines. On a lot of guitars the head also functions in a decorative capacity. If there are going to be ornamental inlays on the guitar they are generally found on the peghead and the fretboard, where they can be seen readily, but won’t interfere with the tone of the instrument. The shape of the head itself can also be decorative and many guitars can be identified just by seeing the peghead.
As with the rest of this guitar, the peghead will be a close reproduction of the peghead of a Stella. The Stella peghead is different from any I have made before. It is squared off at the top end, much like a Martin, but then it tapers to its point of termination at the fretboard without any sort of indentation where it approaches the fretboard end. (Typically, right above the nut, the peghead flares out abruptly about 5 or 10 mm.) I may not be describing this well, but it will be obvious in some of the photos that follow.
So the first part of making the peghead is to cut the profile to shape using a saw, rasps, files and sandpaper. After that, I need to drill the holes for the tuning machines. The 6 tuning machines on each side of the head are mounted on a plate, so it is very important that the holes get drilled precisely where they are supposed to be because any misalignment will result in the tuner not working properly. (This isn’t quite as critical when using individual tuners.) For the set of tuners I am using, the holes had to be exactly 59/64″ apart and all on a line. Here is a photo of the holes being drilled:
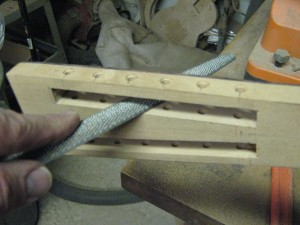
Next, the string slots are cut out. The initial cuts are made with a scroll saw and then cleaned up with files and sandpaper.
These string slots are squared off on the ends. It is more common to have rounded ends. It’s also easier when the ends are rounded, because that can be done with a drill. These squared ends have to be finished with chisels and files.
The peghead is finished for the moment. Next up will be adding an inlay


